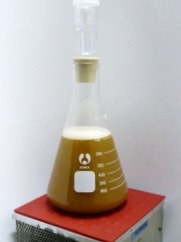
A forced fermentation test is a good tool for those homebrewers who are having some trouble hitting their final gravity after fermenting their beer. This test may be performed by any brewer with or without a lab that wants to check the fermentability of their worts. It is a very simple and very effective test which you should do periodically, whether you are having problems hitting your final gravities or not.
To perform the forced fermentation test:
- Pull a sample of your wort, being extra careful with your sanitation (the amount isn’t critical, just get enough to measure) and place it in a sterile container.
- Inoculate your sample with a very high cell count of yeast.
- Place the container on a or rouse the yeast often by shaking.
- Keep the container warm until fermentation has ceased.
- After 36-48 hours, measure the terminal gravity of the wort.
- ✔ HIGH QUALITY - resistant 316 stainless steel top plate
- ✔ POWERFUL - up to 3000ml capacity, ideal for home brew yeast starters
- ✔ EASY USE - stepless adjustable stirring speed, speed regulation up to 3000 rpm
You can work in gravity units or apparent extract (which is the final specific gravity of beer converted to degrees Plato). Of note, this measurement does not take into account the lower density of alcohol compared to water. If you wish to work in these units, a formula for converting Specific Gravity to degrees Plato is degrees P = 259/SG
Once the terminal gravity has been measured, you now know the practical limit of your fermentation for this wort with this yeast. ie. you should know where your fermentation should finish. If your main fermentation does not ferment as far as the forced fermentation test, you know the problem is in your fermenter (either pitch rate, temperature, oxygenation, yeast health, etc.) If both your main fermentation and your forced fermentation test finish out of the published range (either too high or too low), you can pinpoint the problem to the brewing procedures (either mash temperature, times, crush, ingredients etc.).
After the Forced Fermentation Test, these are the things you should check for:
Forced Fermentation Does Not Attenuate: means that the wort is not fermentable. Check:
- The mash temperature and times. Did you get full conversion? Did you perform an iodine starch conversion test?
- The mash thermometer. Is it still calibrated? Could your mash temperatures be off?
- Your milling procedures. Are you milling fine enough? Check the gap on your mill with a gap tool (used for spark plug gaps)
- Feeler gauge set: made of 65 manganese steel, each measuring feeler gauge has 32 blades thickness; Foldable feeler gauges, easy and convenient to take and store
- Easy identification: dual marked metric and imperial, 0.0015 inch/ 0.04 mm to 0.035 inch/ 0.88 mm, the numbers of size are etched into feeler gauge for easy identification
- Metric sizes (mm): 0.04, 0.05, 0.06, 0.08, 0.10, 0.13, 0.15, 0.18, 0.20, 0.23, 0.25, 0.25, 0.28, 0.30, 0.33, 0.35, 0.38, 0.40, 0.43, 0.45, 0.48, 0.50, 0.53, 0.55, 0.58, 0.60, 0.63, 0.65, 0.70, 0.75, 0.80, 0.88
Forced fermentation does attenuate but the main fermentation does not: This tells you that your wort is fermentable, but there is a problem in your fermentation procedures or system. Check:
- How old was the yeast that you pitched? Did you make a sufficient yeast starter to get the correct pitching rate? When you made your starter, did you use a stir plate? to get optimum yeast growth in the shortest amount of time? How many generations are you on if you repitch your yeast? How was your yeast stored and at what temperature?
- Did you check the pitching rate calculator to find out how much healthy yeast you needed to pitch?
- What about your oxygenation setup? Is there enough oxygen in the bottle to give you the correct amount? Have you changed the filter lately? Are there any leaks in the hoses and connections which could lower the amount of oxygen reaching the wort?
- Did you check the optimum temperature range for the yeast you were using? Could you have fermented too hot or too cold?
- Do you use yeast nutrients to insure the wort is in optimum shape for your yeast?
- Is your temperature controller regulating the temperature based on the ambient temperature or the temperature of the wort? Always put your temperature sensor in a
thermowell in your carboy, or tape the temperature sensor onto the side of the fermenter and then tape a piece of bubble wrap or some other insulation over that so that you will be controlling the temperature of the wort and not the inside of the fridge.
This test doesn’t need to be done every time you ferment, but it is a good idea to do it every once in a while, especially if you are having a hard time hitting your final gravities
References: Information for this article was adapted in part from http://www.homebrewtalk.com/wiki/index.php/Understanding_Attenuation and the Quality Control section of Wyeast Laboratories website
Related: How to Proof Alcohol
Purchase tools to perform a Forced Fermentation Test at MoreBeer.com
Return to Secondary Fermentation Article
Return to Low Oxygen Brewing
Return to Testing

